Back to Silas S. Brown's home page
Bolo Adventures "walk-through"
Further to an odd conversation I had, I am hereby publishing my solution notes to an early-1990s series of puzzle games called Bolo Adventures by William SoleauIndex
- Bolo Adventures 1 floors: 1 | 2 | 3 | 4 | 5 | 6 | 7 | 8 | 9 | 10 | 11 | 12 | 13 | 14 | 15 | 16 | 17 | 18 | 19 | 20 | 21 | 22 | 23 | 24 | 25 | 26 | 27 | 28 | 29 | 30 | 31 | 32 | 33 | 34 | 35 | 36 | 37 | 38 | 39 | 40
- Bolo Adventures 2 floors: 1 | 2 | 3 | 4 | 5 | 6 | 7 | 8 | 9 | 10 | 11 | 12 | 13 | 14 | 15 | 16 | 17 | 18 | 19 | 20 | 21 | 22 | 23 | 24 | 25 | 26 | 27 | 28 | 29 | 30 | 31 | 32 | 33 | 34 | 35 | 36 | 37 | 38 | 39 | 40
- Parts 1 and 2 additional floors (published here), editing the levels and score
- Bolo Adventures 3 puzzles: 4 | 5 | 6 | 7 | 8 | 9 | 10 | 11 | 12 | 13 | 14 | 15
- Rescue Rover rooms: 5 | 7 | 8 | 9 | 10 | 11 12 | 13 | 14 | 15 | 16 | 17 | 18 | 19 | 20 | 21 | 22 | 23 | 24 | 25 | 26 | 27 | 28 | 29 | 30
- Rescue Rover editing and adding Bolo floors
- Rescue Rover 2 rooms: 1 | 2 | 3 | 4 | 5 | 6 | 7 | 8 | 9 | 10 | 11 | 12 | 13 | 14 | 15 | 16 | 17 | 18 | 19 | 20 | 21 | 22 | 23 | 24 | 25 | 26 | 27 | 28 | 29 | 30
- Pitfall Pete screens: 1 | 2 | 3 | 4 | 5; Disc extras: 1 | 2 | 3 | 4 | 5 | 6 | 7 | 8 | 9 | 10
General
Three separate collections of puzzles were released:- Bolo Adventures I (40 puzzles)
- Version 2.0 was probably the most widely distributed. It says June 1991 on the title screen, but some files in the ZIP archive carry 1992 dates.
- Version 3.0 from 1994 adds more instructions but cuts the number of puzzles in the unpaid version to 20. It includes a
.docfile that says Version 1.0 was 1992 and 2.0 was 1993.
- Bolo Adventures II (40 puzzles)
- Version 1.0 says December 1991 on the title screen
- Version 2.0 says June 1991 on the title screen, but most files in the ZIP carry 1992 dates
- Bolo Adventures III (30 puzzles with official solutions)
- v1.1 was released in 1993; the unpaid version is limited to the first 15 puzzles and the first 3 official solutions
- v2.1 was released in 1996 and is much the same but includes references to
soleau.comwhich was registered in that year
Parts 1 and 2 are played on a 22x15 grid graphically represented by twice as many grid-lines as it really needs. Pressing R to "Remove visuals" is a highly-recommended action if you want to reduce eyestrain by disabling the flashy EGA palette cycling. Too bad you can't also halve the number of lines in the background grid and reduce their prominence. The program's version number is given on the registration form during the "quit" process; these notes are for Version 2.0.
Part 1, Floor 1
Push left-hand ball down into river; push one green block right 1 space and down into river; move the other green block over this "bridge" and down, level with the middle ball; push the ball left against the block and up into the river; push the block left one space and down into bottom river so it creates a bridge directly above the bottom ball; go into the robot area and push the remaining green block out and over this bridge (after this point the robot will be running all over the board so take care to avoid it); push block all the way up against (but not into) the top river; push the ball up (against the block) and right (against the grid edge), then position the block so it can be pushed up and lined up with the river (to do this without jamming the movables together, push the green block right once, then up twice, then go around the top and push it right a second time); move the ball and finally the green block itself into the river to the right. You can now enter the top right area: push the 2 balls down into the river, starting with the left one, and you'll be able to access the card and get a clear path to the exit. The laser in this room is simply a distraction and does not need to be blocked.Part 1, Floor 2
Push the green block down 1, right a few squares (stopping just before the sizzling floor) and push the left-hand ball against it. Similarly use the block to get this ball up 1 and right 3 so it's lined up with the ball at the top of the screen, and then it can be pushed up to block the top laser. Use similar manipulation to block the middle laser with the right-hand ball. Then to block the third laser with the left-hand ball, first position the green block so that the ball can be moved right one space, then move it up one space (against the grid-edge), then block-manipulate it right a few spaces, down, right, and up. After the 3 lasers are blocked, a path is clear for you to collect the card that turns off the sizzling floors. You now need to push the top left 3 balls right (against the grid-edge) and down into the river. The ball above the 3 laser-blocking balls also needs to be pushed right (against the conveniently-placed green block at the edge: the floor might have been harder if this block were somewhere else on the edge and had to be moved into place first) and down into the river. Finally, use the green block that's not at the edge to block the laser at the bottom of the screen (push it right up against the laser) and a path is clear to the exit.Part 1, Floor 3
Take the boat and throw 2 balls into the bottom river. Take the top boat, get the card, throw 1 ball into the top river and all 3 remaining balls into the bottom river. Way is now open to move the green block left, up, left (you'll have to walk all around the central structure to push it left from the other side), up, right, down, left and down into the right-hand laser beam; push it up against the laser and the way is clear to the exit. (The left-hand laser beam is a distraction and does not need to be blocked.)There's also a quicker "solution" that takes advantage of a programming error (bug) that occurs when downward balls hit left-pointing boats. Throw the bottom-left 2 balls into the river but don't take the boat, then walk around and push the middle ball down onto boat. Boat will turn into an anticlockwise redirector, 1 square of river is erased and the remaining river square is overprinted by a ball. The square that was erased can then be used as a "bridge" for the green block, which can thus be put directly in the path of the laser without having to do the top section. (If this bug were fixed, there'd still be a quick solution involving pushing the ball onto the boat; I wonder how many players discovered the bug while attempting it.)
Part 1, Floor 4
Too much 'action' from the two robots to avoid which we can really do without (you can remove them by hex-editingbolo4.ovl and changing byte 4c1 from 86 to 80 and byte 4e1 from 97 to 91---see editing the levels below). Push the second-from-left ball Up against the green block. Reposition that green block so that it is diagonally below-left of the one blocking the laser, and move the above ball Left and Down, so it is the ball blocking the laser instead of the other green block. You now have two free green blocks. Carefully move one of them down, right, up (against the ball), right 2 and down 1 so it's level with the next ball. Move that ball left against it, and then the far-right one down and left against them (so it's directly above the boat). Position the other green block directly above the bottom-left sizzle square. Move the ball that's directly above the boat Down, Left and Down. Go up to the top right area and move the extreme top right ball Down, Left, Down, Left, Down and Left (all the while continuing to walk around all the obstacles). Collect the card. Push the stack of two balls from the bottom area into the bottom river (the top one goes Right and Up and then the bottom one goes Up, Right and Up). Use a green block to move the ball that's nearest the boat Right 1 space so it's directly above the boat. Do the same for the central ball (so it becomes positioned at 2 spaces above that ball, and lined up with the ball that's directly under the laser beam). Push the ball that's under the laser beam Left against this, and use the green block to position it up 2 spaces and left 1, so now there are 3 in the column (with gaps in between). Throw the 2 green blocks into the first two rivers just left of the right-hand row of metal bricks. One at a time, bring the column of 3 balls down onto the boat, right, and down, clearing a way to the exit. (There is even a "spare" ball positioned just above the laser that can be used for this, so you only really have to make a column of 2 balls, not 3. Note that you don't actually take the boat on this floor.)
Part 1, Floor 5
Put 1 of the 2 green blocks into the river at the 3rd column from the right-hand edge. Use other green block to get 1 of the balls in at 4th column from right, and other ball in same column so it can be pushed left to dry up the 5th column from right. Then the block itself and finally the boat can be used to gain access to upper area. Ball then needs to be used to block top laser by well-timed bouncing it onto the robot. Way is now open to get card and exit (pushing green blocks out of the way at left).Part 1, Floor 6
Don't try to block the top laser and free the 3 movables: that's just a distraction. The solution is: take the first boat, and push the green block as far to the right as it will go. Then take the second and third boats and collect the card (a path is clear to get it if you look carefully). Push one of the free balls Left and Down into the middle river. You will now be able to reach the exit by pushing a green block out of your way.Part 1, Floor 7
There is a nasty distraction on the left---a green block and laser setup which looks like you should use the bottom 2 balls to block it. Ignore all this---it is not necessary to block these lasers. Just push that green block out of your way---you won't be using it. Push the bottom-right ball Up, top-right ball Right, top-left ball Right and Down, bottom-left ball Right and Up, remaining movable top-right ball Right and Down. Push 2nd laser-blocking ball up against its laser, and walk in without collecting the card. Sizzle the ball that's in your way, and also the 2 'obstacle' balls at the top. Now go and get the card, and you will find the route is clear to the exit.Part 1, Floor 8
Basically a full-screen maze but some blocks can be 'sizzled' to help clear the board. Remember to clear a way to the exit via the bottom edge before collecting the card: Start with block movements down right left left down right down right and then start sizzling in the bottom area. If you carefully sizzle some of the blocks on the left of this as well, you should then have more manoeuvring space to sizzle other blocks: you should be able to end up with just 3 blocks against that wall in that area. Be careful not to make any move that will block your way after though. It should then be possible to carefully make a path diagonally up to the middle of the screen (sizzling rather than blocking-in as much as possible), down to the right a bit and up to get the card, and the way is then clear for the exit.Part 1, Floor 9
Block top laser with a ball (using the green block to move one so it can be pushed against one of the other balls). Use green block to line up 2 other balls onto 4th column from right of screen (any 2 balls will do for this as long as they are not on adjacent rows, i.e. don't use both of the pair at the top, and as long as neither of them is on the row immediately above the river). Green block itself can now be put into river on the same 4th-from-right column, and one of the lined-up balls used to block the middle laser. Push it right up against the laser, then push the ball that was below it Down. Then the other lined-up ball can be pushed down to block the bottom right laser. The rest is "action": the bottom left laser needs to be blocked by a well-timed ball push against the robot, then the card can be collected and a path is clear to the exit but be careful not to run into the robot (moving more balls may cause it to leave your area which makes things slightly easier).You could also solve this floor by putting 4 balls into the river instead of using up the green block. That block can then be used for the bottom-left laser, reducing the necessary action in that corner but resulting in lower score. If using this approach, the robot can optionally be trapped at the right with 2 balls before the laser is blocked.
A third alternative involves lining up three balls on the 4th-from-right column before putting the green block into the river below them. Both upper balls must be used: after moving the bottom one into the correct column, move it down 1 row (with the aid of the block) before moving the top one into place so you'll have room to push both of them down. Then when you come to block the bottom-left laser, instead of bouncing a ball onto the robot, you can move the right-hand ball against the left one and down, then the topmost ball down, left, down and left.
Part 1, Floor 10
Push ball down onto the boat. Push ball left against the 1st set of metal bricks. Push leftmost ball right so there are 2 balls at end of river. Rightmost ball down into river. Ball that's now in middle of top area left, down, left into river. 2 more balls + boat into river and remaining ball can now be used to block the 1st laser. Push leftmost bottom-row ball Right. 2nd & 3rd balls on 1st row can now (in turn) be pushed against the 1st and up into a column, which together with the 2nd ball on bottom row can be used to block the 2nd laser (which will be 'activated' when the card is collected). Then, after the card is collected, the ball that's now blocking the 2nd laser can be pushed left, and the ball that's now immediately below the player can be pushed down: it will now be stopped by the repositioned 1st bottom-row ball and will block the 3rd laser, leaving a path clear to the exit.Part 1, Floor 11
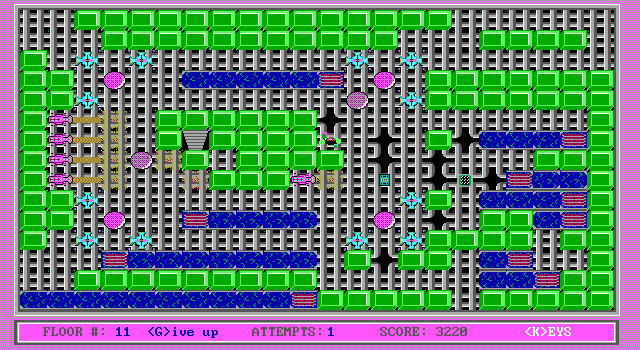
This starts off as an "action" floor. Perhaps the easiest approach is: first of all push the extreme right-hand ball Left against the middle gaps, then push the top middle ball (the one just below the row of 4) Right at the correct time so it is stopped by a robot just below the right-hand gap squares: try to make it line up with the second or third gap square. (May require 2 pushes. If it misses the robot and goes to the edge, press G and start again. But don't be tempted to do this before pushing the extreme right-hand ball, as if you do it's possible that both robots will end up circling that very small area and it will be hard to fetch the right-hand ball from them.) There are now 2 balls that can be pushed Up (against lasers), Right (against the ball you moved) and Up, to stack and block the top-right laser. Push the top-right laser-blocking ball against its laser and you can access the boat. Don't worry if the robots end up on the top row: the effect of walking into the top-left square is to make all the robots disappear, which makes things considerably easier. (It's theoretically possible to complete this floor without going up there, by collecting the card, out-running the extra robots that are freed by this move, and bouncing balls off robots to block the bottom two lasers, but why settle for such awkward action when you can have a proper 'thinking' puzzle.) Now the robots have disappeared, collect the card at your leisure. Of the row of 4 balls at top middle, push all but the first Up into the river. Move the green block Right 2 spaces and Down 2 spaces. There is now a ball that can be pushed Left against it and Down, and another that can be pushed Up, Left and Down to stack with this, blocking the bottom laser. Then of the 5 balls at bottom right, the third can be pushed Right (against the fifth) and Up against the steps to clear a path to the exit from the right. (The first, second and fourth of these balls are not used.)Part 1, Floor 12
4 balls can be thrown into the top left river to access the coloured square at the top, which has the effect of reversing the flow of the rivers. Card can then be accessed easily via boat (plus 1 more ball in bottom river to get the boat), but remember to sizzle a ball first to make sure you have an exit from the area where the card is. Top laser can be blocked and other coloured square accessed to reverse the flow of the rivers again. 2 balls can be thrown into middle river so that the way is open to push the ball that lines up with the steps up against the steps to block 3rd laser in the group of lasers. 2 more balls can be indirectly moved (bouncing off metal bricks as appropriate) so they are horizontally aligned at right of screen and the one on the left can be pushed up to block 4th laser. Boat can then be taken, 3rd-laser's ball pushed right up against it and steps accessed (2nd laser does not harm the player when steps are accessed).Part 1, Floor 13
Of the bottom left balls, the leftmost can be pushed down, then the other pushed right at the loop of redirectors to be put in the river. Then the one that wasn't thrown in the river can be pushed right and is redirected to end up in the 4th column just below the river. The two now-bottom balls can be pushed (one at a time) up against their counterparts and left onto the redirectors loop, and then the leftmost from the top row can be pushed left (redirected down) and right (redirected up) to be positioned so as to block 2 more balls which can be sent Left against it and Up, so the river is dry enough for the card to be accessed. Push in a green block from the bottom, so the green block from the top can be moved across this 'bridge' and down to block the bottom laser (you'll have to push two balls Right while you're walking around to the top of this block to push it down). Send a ball from the top right area to the very top row and let the top redirector help it block the top laser so the green block is freed (there may be a display bug which shows a segment of the laser still visible after it's blocked, but it won't hurt the player and the display will be corrected after walking there). This block can then be moved down to the lower area and used for block-and-ball moving to get 1 ball into the lower river, but be careful of the "stepped" metal bricks at lower right---the ball needs to go via the blocked laser's row, not the row below that. To get a 2nd ball in, you'll have to push the ball that's now top-left in this area right 1 (using the green block to stop it), then go over the bridge and push it down, finally push the block left 1 and go over the bridge again to free it. You can now block-and-ball it right, up, etc and get it in the river. But you need a 3rd ball. To get this, you have to make a second "bridge" 2 spaces to the left of the 1st (move the top ball out of the way by throwing it into the river, then move the green block left and down) and it's then possible to access the ball below. Finally the green block itself can dry up the final square, then the boat can be taken on the middle river to access the exit.Part 1, Floor 14
Basically an 'action' floor as you have to push the ball up against a robot at the exact time that such a robot is in position to stop it below the laser beam, while avoiding all the other robots. Once this is done, it can then be pushed up to block the laser beam if again timed so it hits the robot that's above the beam (which will then be "released"). Then the card can be obtained and a path is open to the exit. The main difficulties are (1) if you leave it too late, the robots will tend to clump to the right of the screen which is not a useful place, (2) robots continue to run while the ball is in motion, making timing highly difficult.Part 1, Floor 15
To clear the bottom river, 2 balls can immediately be thrown in and another 2 via a redirector (the one on the 3rd row up from the bottom edge), but before getting the card it's necessary to sizzle a ball that would block the exit. Then the difficulty is that, after the card is collected, the ball you have to move out of the way to leave that area will be redirected so as to re-block the exit. To stop this, before collecting the card make sure to pile up 2 balls against the leftmost edge (the two balls on the 4th row from the bottom will do nicely for this). After that the card can be collected and a path is clear to the exit. (The lasers and the top river are distractions; you don't have to do anything with them.)Part 1, Floor 16
Do not collect the card until the left-hand laser is blocked. The top boat actually takes you right (not left). If you first sizzle the ball that is to the immediate left of the 'diamond' of green blocks, it's then possible to take the boats to the right-hand area and get out again afterwards (at the expense of a further ball and a green block being sizzled), and you'll also free up a green block for use in the left-hand area. Also on the right-hand area, 1 green block can be used to fill in the river square just below the redirector, allowing you to block-and-ball move the 2 lower-right balls (one at a time) onto the redirector and into place to be pushed up to dry 2 squares of the top left river. A further 3 balls from the central area can then be comparatively easily pushed Up, Left and Up to dry up 3 more spaces of this river, and then the green block placed so as to block the laser when the card is collected. Then to actually collect the card it is necessary to dry up the short second river, which can be done by fetching a second green block from the right-hand area and using block-and-ball motion with the remaining 2 balls followed by the block itself (there is another block fetchable from the right but that's not necessary). Then the card can be collected and the laser-blocking block pushed up against its laser so that a path is clear to the exit. The bottom left area is a distraction and is not used.Part 1, Floor 17
A full-board 'one-way maze' level where it's quite easy to trap yourself. I found the first 22 ball-moves by feeding the board into a special "tree search" program I wrote, and then took it manually from there. (I didn't let the program solve the entire board as that would have taken too long: it was using 'best-first' tree search but my 'static evaluator' function didn't perform well. But it was useful to ask it for a route to the bottom-right coloured square, as things get simpler after that.)The full solution is: Push balls Down, Left, Up, Left (redirects), Up, Left x4 (last one redirects), Down, Right, Down, Up, Right, Down, Left, Down, move player up 1 and right 2 to push a ball Right, then push balls Down, Right, one on the right goes Down (redirects), Left, and a path is clear to the coloured square that deactivates the robot. Collect it and you should then be able to clear a path along the bottom (start by pushing the 16th-column's ball Up), and when you get to column 8 start clearing a path up and left to a redirector that's near a sizzle square. Redirect 2 balls (one to the right of you followed by one above you), and you can then sizzle 4 balls and open a route to the card, but don't collect the card yet. Carefully clear a path anticlockwise around the top of the sizzle squares and sizzle the balls that are blocking your route to the exit (when you come to the 'diamond' of balls near top left, sizzle the left, right and bottom balls in that order so you can still sizzle the final 'obstacle' ball down below), then come back and collect the card and exit.
Part 1, Floor 18
Basically an 'action' level: the 5 balls in the bottom area need to be used to dry up 5 spaces of the bottom river while avoiding the robot (thankfully it is not necessary to do any well-timed bounces off this robot, or even bounce any of the balls off each other: they can all be quite trivially thrown into the river via the left edge). Then the boats can be taken, then a path is theoretically clear to collect the card and exit, but once the card is collected there are 7 robots let loose and presumably you have to out-run them. Since it seems random numbers are at times involved in their decisions of which way to turn when blocked, it may be necessary to attempt this level many times until all of the robots randomly get out of the way.Part 1, Floor 19
Sizzle the ball at the bottom left so it doesn't block you later. Push the 2nd ball on the bottom row up to block the middle laser. Push it right in against the laser. Leave the remaining 3 bottom-row balls as they are, and use the blocks to move the 1st, 3rd and 5th balls from the top row into a matching row of 3 balls above the 3 bottom-row balls (leaving space for you to walk between them). You should now have 3 on the top row, 3 on a middle row and 3 on the bottom row. Move the green blocks out of the way but not against a wall. Push the middle ball in the top row left (hitting the first ball), and then push it down to block the bottom laser. Now throw 1 green block into the river (left-hand space). Push another green block up against the right-hand sizzling floor, and use it to throw 1 ball into the second river (from the middle or bottom row). Push the other green block into the 3rd river, then use the green block against the sizzling floor to push 5 more balls (from the middle and bottom rows) into the top river. Now carefully move the remaining green block into position to the immediate right of the horizontal sizzling floor that is below the lowest river, so as to block the top laser when the sizzling floors are switched off. The way is now open to get the card and exit. (The topmost ball is a distraction, as is the boat, and one of the top-row balls which doesn't have to be used at all.)Part 1, Floor 20
Basically a one-way maze, here is one solution: left, up, take 2nd boat, up, up, up, up, left, down, left, left, (get card) up, left, up, right, up, up, left, right, up, right, up, left, leftPart 1, Floor 21
Carefully move the green block down 3 spaces (right above the sizzling square) before walking into the dial pad and getting 4 balls. Push down, and use block work to get these 4 balls into the river (via the 6th and 7th rows up from the bottom of the screen). Similar for the other dial pad (it's more 'tedious block-and-ball moving work' than anything else). You can use the block itself to fill the last river square, so 2 balls are not needed. Once the river is dry, touch the square at the top right of the screen to clear the remaining dial pad. The way is now open to collect the card and exit.Part 1, Floor 22
Try not to be hit by the random electric worm. Sizzle the top ball, and move the single green block that's roughly below it Up to the top row. Then go to top left blocks: 2nd up and R as far as it will go, 1st down 1 space. Then go around and push the 'obstacle' block up to the top of the screen, so a path is clear for the top-left ball to be thrown into the river. Middle ball can then be pushed Right, Up, Left, Down, Left, Down into river. Then for the 3rd ball, you'll need to clear 2 single blocks from the middle (10th) column of the screen (you can take them to sizzling squares if you like), then move the bottom right blocks to the very bottom row, and push the ball Down, Left, Up, Left, Up, Left, Down, Left, Down. Finally, dry up the last square of the river with a green block. Get the card and exit.Part 1, Floor 23
Sizzle the top ball. 2nd dial pad from left: press Left, then go around and move its bottom ball Up, then move its right ball Down. Push the ex-bottom ball Left, Down and Left again. Leftmost dial pad: press Up, go around and push it Left, Down and Left again. Of these 2 balls, push left one Up so you can get around to the back of the right one and push it Down into the river. Use same procedure on the remaining 2 balls from what was the leftmost dial pad to get a 2nd ball into the river. Sizzle (or at least push left) the ball that is now to the player's above left. Rightmost dial pad: press Left, repeat procedure to get this ball into position; go back and move its right ball Down so its top ball can be moved down, left and repeat procedure to become the 3rd ball to reach the river. Once again, get rid of the ball that is now to the player's above left. Remaining dial pad: perhaps counter-intuitively, press Down (not Up!), go back and push its top ball Down and repeat procedure to get this into position; you should then find there is a ball in the middle of the screen which can be pushed Right, Down and manoeuvred using the same procedure to become the final ball to go in the river. Collect the card, block the laser with the appropriate ball, walk to the exit, move the left ball down and the top ball right, and take the exit.Part 1, Floor 24
Take 1st & 2nd boats. Take the boat on the 4th river. Then on the 5th river take the right-hand boat. Take the final (6th) river's boat. Push 2nd ball down into topmost river so boat is accessible from the top. Push 1st ball right and then up. Push lower left ball (the one below the 3rd river) Right, take right-hand boat, (optionally get rid of the ball and) push green block into end of 4th river. Now go back around and take the top boat. Push the right-hand ball up. Go back around and push it down 1. The way is now open to get the card without being zapped and to reach the exit.Part 1, Floor 25
Of the 6 balls at top right, (working from left to right) push 2nd one down, 3rd left and down, 4th left, down, left. Go down to the 6th row and push the ball Left against its laser, then move what was the 5th ball at top right Left, Down, Right (you can move ball 1 Left to get it out of the way if you want), Down, Left, Down. The row you're now on has 2 balls to the right: push each in turn Left and Down, blocking 2 lasers. Push the ball at the bottom of this stack Left (and leave it there: it's important; also leave the laser-blocking balls where they are: don't push them against their lasers). Move the green block Right 1, its ball Up, and the block Up 2. Go back up to top left and move the left-hand 4th row ball (the only ball near the top left corner that's free to do this) Right, Down, Right and Down. Go left 3 spaces and up 2 spaces, and move that ball Left, Up (see what I meant about not sizzling that ball or pushing anything against those lasers), Right, Down, Right and Down (stacks with the first; bottom 2 lasers are now blocked). Go back to the top right of the screen and push that ball Down, Left and Down. A route is now open to collect the card and exit. See also notes on score.Part 1, Floor 26
Put 1st ball in middle river. Do the next square of the middle river with one of the left-hand green blocks. Use the other left-hand green block to line up the 2 left-hand balls level with the gap, and to bring down the top middle ball also level with this gap. Then put the green block into the final river square, opening access to the right. Using one of the right-hand green blocks, do block-and-ball work to get all remaining balls (apart from the 2 on the bottom edge) into the top-right river. Then move the 2 remaining green blocks over to the left and use them to block the lasers. Sizzle the ball to get it out of the way. The route is now open to collect the card and reach the exit.Part 1, Floor 27
Balls on row 3 are in the way---push them out of the way by pushing edge balls toward the centre. Row 2 balls 2, 3 and 4---push left, then push the last one down and right. Row 1 ball 2---down. Ball 3---down, left, down, right. Balls 4-7 (one at a time)---down, left, down, right, down, left. Ball 8---same, but end by pushing it down to block 5th laser. Ball 1---right, down, right, down, left, down (blocks 4th laser). Balls 9-11---down, left, down, right, down, left, down (blocks remaining 3 lasers). Collect card and exit.Part 1, Floor 28
One at a time, move all 5 immediately-accessible balls Up and Right. In the row of 5 balls that this formed, push 2nd one down, and 1st one right and down to block bottom laser. Push it right up against the laser. Push right-most ball left, then up to block top laser. Push it up against the laser (this step is optional but makes movement easier). Don't collect the card yet as there will be more lasers. The remaining bottom ball can be moved up and right to make a row of 4 again. Of these, ball 2 can be pushed up, then ball 1 right and up, to make a stack of 2 at the top of the screen. Finally, the 2nd ball on the 4th row of the screen can be pushed left against the first, down, right, and up to add a 3rd ball to the stack, at which point the way is open to collect the card and exit.Part 1, Floor 29
Push middle ball on bottom row up to block laser. Use another 3 balls to make a "pile-up" at the top right of the screen: put 1 against the right edge, then use this to push 2 up into a pile in the penultimate column. Don't collect the card yet. Push another ball up into the 4th row from the top of the screen (it will block laser 4), and one down into the path of laser 9 before collecting the card. Pushing all laser balls against their lasers (or at least lasers 4, 7 and 9) frees up 3 balls to push right, up, right and down to make a stack of 3 at bottom right penultimate column (re-use the rightmost-column ball that was placed to get the card). Then the middle of these can be pushed against its laser and the path is clear to the exit.Part 1, Floor 30
Exit the central area from the right (taking care to keep the block usable), move the ball left and up, and push it left against its laser. Use tedious block-and-ball manoeuvring to stack 4 balls on top of the gap square on the bottom edge of the screen (you'll need to move the balls down 1 row before moving them horizontally; at least you have two green blocks to help position the balls, not just one). After the laser is blocked, push the ball right up against its laser, and put one of the green blocks into the 3rd square of the river. Then push the bottom ball into the river, followed by the one above it after moving the 3rd one out of the way with the help of the other green block (we still need to use this ball, so don't push it against an edge). Use block-and-ball motion to get that other ball into the 3rd column from the left edge (but do this without sacrificing the block, i.e. push the ball up against something that's already in the 2nd column: the middle gap square will do nicely). Also, while you still have the block, make sure the final top-row ball is at least in a position where it can be pushed onto the top left of the screen (i.e. if you already used up the leftmost ball, put the remaining ball into that place). Now move the green block into what was the 3rd square of the river, then go and push the 3rd-column ball down onto it. Finally, walk the other way between the sizzling squares and push the block into the 2nd square of the river. The way is now open to collect the card and leave that area, and you should also be able to exit the level, blocking the final laser with the remaining ball if you have not already done so.Part 1, Floor 31
Topmost dial pad (apart from the top-left "trap" dial pad): press Down (sizzling a ball), then push its right-hand ball up into the river. 3rd dial pad on middle row (the one nearest the very middle of the screen): press Right, and push it up; also move its leftmost ball right & up; of this stack of 2, top can be sizzled allowing access to push bottom one left and up into the river. Also the same dial pad's bottom ball can be moved against the top, moved right, and up in preparation for the next stack. 2nd dial pad on middle row: press Right, move the resulting ball up, then similarly sizzle the top ball of the stack and put the bottom one in the river. Similarly get that dial pad's left ball right and up making a new stack, move its bottom ball against the top and make the second ball of this stack, and go through the same routine of sizzle + push into river. Move the right-hand ball on the middle row Left so it is directly above the 2nd dial pad on bottom row, then get that dial pad and press Up, move it right and into position, similarly move the dial pad's left ball against its right one and move this into position (just push the bottom ball right to get it out of the way), and repeat the procedure. Collect the card. Dial pad mid-right: press Down. Dial pad mid-left: press Right. Also move its left ball out the way (up or down) and move its top ball down, right, down, left, down (blocks bottom laser). Push the bottom right ball (the one that's against the gap) Left. Push the ball that was directly above it Down and Left (so they are both together 2 spaces below a laser). Push what is now the highest ball on the screen up, left, down (against that pair of balls), right. One by one, move the remaining 3 balls from the right-hand row along the same route so there is a row of 4 balls against that gap. The first ball in the row can now be pushed down to block the 2nd laser, and the way to the exit is open.Part 1, Floor 32
Another "one-way maze" level. A route can be opened to the right, up (through a dial-pad) and to the left allowing the exit-blocking ball to be sizzled (and one or two others also, but don't get carried away), then along the top and down from the top right, then over to the card (taking care not to run into dial-pads unnecessarily as this might block your return route). After that the card can be collected and the exit accessed. Beware of the electric worm (it's sometimes possible to trap it inside a single block, but make sure that's not on your route).Part 1, Floor 33
This is more of an "action" floor than a puzzle. It's a maze full of robots and an electric worm, and a lot depends on the random number generator.Part 1, Floor 34
On the 5th row up from the bottom, one at a time push balls 3 and 4 Left against ball 2, then push the ball from the row below Up and Left against these (making a row of 4 that ends just below one of the entrances to the 'complex' in the middle of the board). Then, bottom-right wall ball push left, right wall balls push down & top wall balls push right = can get 2 balls from the left of the row of 4 and push them down, right & up into a stack of 3 so 1 is level with the redirector. Can then be pushed at the redirector, and then there are 3 balls to its right: one at a time, push these against it and down into the complex, blocking 2 of the lasers. It is now possible to get the card and exit.Part 1, Floor 35
Tedious block-and-ball work to fill in 3 river squares and block 2 lasers. There are not enough movable blocks to block all 3 of the lasers, so you should block the top one and the bottom one but not the middle one (it can be walked around). There's also a nasty something-or-other to avoid but it's not usually much of a threat.Part 1, Floor 36
This floor doesn't allow you to remove the 'visuals' (flashing), and you have to play it invisibly after you've stepped on the tile that does that. The first thing you need to do is get to the exit and push the ball onto the sizzling square (if you don't do this before turning off the sizzling squares, the ball will block your exit). You can do it by going diagonally down to the left, pushing the ball immediately to your right into the sizzling square, going up, down a bit, and diagonally up to the right, sizzling another ball, going round that sizzling square, pushing a ball to the right edge and then pushing it up into a sizzling square, and then going up and around to the exit and sizzling that ball. After that you need to go back for the card (there is a clear path) and then you will have a clear and easy path to the exit. Most of the balls on the board are a distraction, and most of the difficulty comes from the tedium of doing it invisibly with the flashing switched on rather than the logic itself. If solving another floor after this one, you'll have to repeat the Remove Visuals command.Part 1, Floor 37
Use 2nd green block to block the laser directly above it. Go back down and push right-hand ball Right, Up, Right, and Up again, blocking a laser at the very top of the screen; push it left against its laser, and then go and push the ball that was next to that laser Down, so it blocks the laser that was being blocked by the green block, freeing up the green block. Block-and-ball the rightmost bottom ball against the middle bottom-set laser (the long one that's on the 5th row up from the bottom edge of the screen), and push it right up against its laser. Block-and-ball the rightmost middle ball (from the area you just gained access to) onto 4th row from bottom, directly above bottom laser, and down so it's on top of bottom laser and is blocking the one above that (you don't have to block the bottom laser itself). Block-and-ball the bottom left ball onto the top-right row of the screen (this will likely involve bouncing it onto the centre structure en route). Leave the green block in front of the 2nd laser on the 5th row from the top of the screen, and put the other green block in front of the laser 4 rows up from the bottom of the screen. Get the card, push the ball to the left and a route is clear to the exit. (The bottom-row laser will not harm the player when the steps are accessed from above.)Part 1, Floor 38
Green block down 1, left 3 and down 1 again; throw a ball against it and Down to block the bottom laser (you won't have to block the next laser). Move the green block out, throw a ball into the river, and leave the green block in the path of the bottom-left laser (on the 3rd row up from the bottom edge of the screen) for when it switches on. Cross all rivers (put a ball in each). Of top right 3 balls, push 1st Right and second Down, Right and Down. In middle row, push 1st Right against 2nd, and Down so it's blocking the laser. Push it against its laser. Now push the ball that was below it Left and Down to block another laser. Push it against its laser. Push the extreme top right ball Down and Left. Push the ball that is now to the left of it Up (against the gap), and then push the bottom-left ball Right and Up to "stack" with this one. Get the card and exit.Part 1, Floor 39
This is just an "action" floor---you are invisible, have 22 robots to contend with and cannot remove the visuals. Other than that there are no puzzles here: as long as you can keep track of where you are and avoid the robots, you should be able to collect the card and exit. (It helps if you know the card is located on row 7 column 11, best approached via column 12, and you start in row 15 column 22.)Part 1, Floor 40
Push topmost ball Right, and also push 5th row from top Right. (The former is to change the behaviour of the redirectors, and the latter is to get that 5th ball out of the way.) Push 2nd from bottom Right, then Down (it will end up on the 4th row from the top). Push 4th row from bottom Right. Push 3rd row from bottom Up, Right and Left. Push ball on 6th row up from bottom: it will stop at the redirector where the topmost ball got 'stuck', and it can then be pushed Right and Left (around redirectors). Push 6th row from top Down, Right, Right, Left and into the river. Push the ball from the 'steps' row Right, and push the ball that was immediately below it Up to replace it. Push 3rd-from-top row Right, Up (around redirectors) and into the river. Push the middle ball from the 2nd row down, right, up and into the river. Then push the ball that was to the right of that one Left. Now there are 2 pairs of 2 balls each near the top left. First, move the bottom left one Down, Right, Right, Left and into the river. Then move the 5th-row-from-bottom ball Up (to 3rd row from top), and move this Right, Up and into the river. Then the top left ball should be moved Down, Right and Down (ends up on row 4). Push the steps-row ball Right (goes to row 2). One at a time, push these 2 2nd-row balls down to row 3, then Right, Up and into the river. (You may need to knock a wall ball out of the way before pushing the 2nd one.) Push the leftmost row-4 ball Down and the rightmost Right, Right, Left and into the river. Finally, the ball on the row above the steps can be pushed Right and into the river (this is the longest sequence of redirectors). Collect the card and exit.There is no ending sequence. The standard choice of "next floor or main menu" also appears at the end of floor 40, but either key takes you to the main menu.
Bolo Adventures 2
I did not originally intend to try Parts 2 and 3; Part 1 was more than enough. (When I was obtaining PC software in 1993, I had to rely on UK-based postal "Shareware" libraries, and I don't recall anything other than Part 1 being available from them. I didn't pay to "register" with US-based authors because the complexities of doing so from outside the US were prohibitively difficult for a minor at that time.)However, seeing as I'm now putting this on the Web, I did have a look at the Internet Archive downloads and made notes on the Part 2 floors. To save time I gave 9 of them (floors 11, 12, 16, 17, 18, 27, 29, 31 and 37) to my tree-search program (the one I wrote for the start of Part 1's Floor 17), as those 9 seemed particularly suited to it.
Part 2, Floor 1
Move the green block Left, sizzle the Right ball, top right block Right 1, other block to move ball under 2nd laser, ball up, right, up, block left + up, collect the card, left-hand block can now get ball out of enclosure while right-hand block is positioned below top block so ball can block laser on 4th row from bottom; block 1st laser with green block, ball against laser, remaining block to bottom-left laser and exitPart 2, Floor 2
An action floor: at least 3 of the balls have to be bounced off the robot. Then don't touch the top-right ball when on the way to the card.Part 2, Floor 3
More action: block-and-balling in the presence of robots to fill in 2 river squares. Since the green block must be saved for the laser, it cannot be moved too far left, or against the right-hand edge, so balls will need to be bounced off robots in these places.Part 2, Floor 4
Start by stacking 3 balls onto the bottom-right ball to block the laser (middle and left balls one at a time Right and Down, and the four outer-middle balls can provide a third if firstly the top left is moved Right, the bottom right Right and Up, and the bottom left Right, Up, Right and Down). Now move the top left ball Down, the bottom left ball Right, and the bottom middle ball Left and Up. Move the ball that's now to the direct right of this Up and Right, then the bottom left two balls (one at a time) Right, Up, Right and Up. Of the laser-stack's balls, move 1st and 3rd Left and the other two Up. Push the rightmost-column ball Up into the top right corner and then the ball to your left can be moved Left, Down and Right to dry up the river. Collect the card and exit.Part 2, Floor 5
Full-screen maze. Clear a path up to the card but be careful how to get into it: right-hand ball up, block left, ball left, sizzle a block and use another to block the laser. Don't collect the card yet. Make your way right over the the 15th column, and push the block to the top right of its ball Right, the ball Left, and push blocks Right, Down, Right, Down, Right, finally sizzling an obstacle block to the immediate left of the exit. Now go back and get the card and a way is clear to the exit.Part 2, Floor 6
Take the left-hand boat. Well-timed push onto robot to block bottom laser. Carefully block-and-ball another 2 to line up above the right-hand boat, plus 2 to line up just to the right of the right-hand lone metal brick. Put the block just left of the 'bridge' and move the first pair of balls in (blocking the 2nd laser and releasing the robots), wait for the robots to come out, go in, push both laser-blocking balls against their lasers, throw all 5 remaining balls into the river, take the boat, collect the card and exit.Part 2, Floor 7
Bottom left dial pad: press Left. Use that ball to push its right and bottom balls, plus left, right and bottom balls from the bottom-right dial pad, into the river. Push leftmost ball Down, and ball on right Right, Down, Left and into river. Take boat and collect card. Push central ball Right and Down. Top right dial pad: press Right and push it Down. Push its left one Right, Down and Right, and its bottom one Up, Right, Down and Right. Use this setup to stack 3 balls from the remaining dial pad up against the steps. To get the final ball, push the 2 top balls Right and one of them will be free to come down. Path can then be cleared to the exit.Part 2, Floor 8
Action floor requiring timed ball-pushes against robots while avoiding them.Part 2, Floor 9
Bottom right ball: Right. Top left ball: Down and Right. Middle of the 3: Down. Extreme left ball: Right and Down. Ball that is now second from left: Left and Down. Bottom left balls Left and Down. Remaining 3 balls Right and Up. Collect the card and exit.Part 2, Floor 10
Basically an 'action' floor (invisible, can't remove visuals, robots to avoid) and 7 balls need to be bounced into the river (at least some of them off robots).Part 2, Floor 11
My tree-search program found a solution to this by itself, after I hinted the static evaluator about keeping a ball to the lower right of the top river (so others can be bounced off it---I knew that was almost certainly part of the solution, so I didn't want it to waste too much time searching other states). The bad news is the solution it found involves as many as 80 ball moves. I didn't let it burn out my CPU doing an exhaustive search for a shorter solution, so here is the long one:Move the extreme left ball Down and Right. Move the ball that's now to its immediate right: Up and Left. Move the ball that's now to its immediate left: Up. Move the ball that's now above this: Right. Move the ball that's now to its immediate right: Down and Right. Move the ball that's now to its immediate right: Down, Left, Down, Right. Move the ball that's now second from left (row 9 column 9) Down and Right to stack with this one. Move the ball that's now to its immediate right: Up, Left, Down, Left. Move the ball that's now to its immediate left: Down. Move the bottom-right ball Right, then go back and move the bottom-left ball (the one that's lined up with it) Right to stack with it. Move the bottom-right ball Up, Left, Down. Move the bottom ball of this stack Right, Up, Left, Down. Move the bottom ball of this stack Left, and Down into the river. Move the extreme left ball (row 8 column 8) Right, Down and Right. Move the ball that's now directly above it Down, Left and Down into the river. Move the two balls that are now second and third from top (rows 7 and 9) Left, and move the bottom one Up, Right, Down, Right, Up, Left and Down into the river. Collect the card. Move the top left ball Up (and leave it there: that's the hint I gave to the static evaluator, which activated as soon as the card was collected). Move the bottom left ball Down and Right. Move the top right ball (the one on row 2) Right. Move the ball that's now directly below this Up. Move the ball that is now second from bottom Down, then move the bottom ball Right and Up. Move the ball that's in the middle of this stack Left, then the top one Down and Left. Over on the left, move the middle and right-hand balls of the stack Down. Move the top right ball Left and Down, and move the ball that is now bottom of this stack Left, Up, Right and Up into the river. Move the bottom right ball Left, Down, Left and Up. Move the bottom ball Down, Left and Up. Move the ball that's above this Right and Up into the river. Move the bottom right ball Left, Up, Right and Up into the river, and finally the left-hand ball Up, Right and Up into the river and take the exit.
Part 2, Floor 12
My tree-search program found a solution to this floor by itself as well (although I did custom-hint the static evaluator a bit), but it involves 67 ball moves: not quite as bad as Floor 11 but a close second.Bottom right ball Down, Left, Up, Left. Top right ball Down, Left, Up, Left, Down. Bottom right ball Left. Ball to the left of it Up. Top ball Left, Down. Bottom right ball Right (against the brick just left of the bottom river). One to the left of it Right to stack with it. Right-hand ball of this stack: Up, Left. Then the other one Right, Up, Left to stack with it. Middle ball of this row of 3: Down, Right. Left-hand ball Right. Both balls in 6th column: Up; 2nd of these Right and Down as well. Ball in centre of screen Left, and ball to the right of this Left to stack with it. Left-hand one of these Up, Right, Down, Left. Left-hand ball of the resulting pair Down, Right, Up, Left. Left-hand ball of that resulting pair Down, Right. Both 6th-column balls Up to make a stack of 3 at the top. Middle of the stack Right, Down. Ball that's now to the left of this Left, and move the right-hand ball Left to stack with it. Move the left-hand ball of this pair Up, and the ball that's now directly above it Left and Down (blocks laser). Collect the coloured square to change the direction of the rivers. Ball near middle of screen (just above the level of the bottom laser) Down, Right, Up, Right, Down. Don't collect the card just yet: move the bottom left ball Left and Up first. Now collect the card, and move its ball Left and Up to meet that one. Of the resulting stack of 2, push the top one Right and Up into the top river. Ball that is now bottom right can now go Up, Left, Up, Right, Up, and finally the left-hand ball can go Up, Right and Up and the steps can be accessed.
Part 2, Floor 13
4 balls and a block need to go in top right river, + 2 balls and a block in bottom left; the row of balls at top left can be accessed only from the right and at the expense of one, but the other two can be got out at the expense of several green blocks (of which there are plenty); the main difficulty is the 'action' from the robots.Part 2, Floor 14
Ball Left + Up, ball Right + Up, take middle boat, top ball Left + Down, take top boat, collect the card, ball Down to get out, take boat, final ball Down and a path is clear to the exit.Part 2, Floor 15
Basically an 'action' floor due to the robots: at least some of the time you will need to bounce balls off of them in order to stack 5 on the right (although the required stack near top left can be done without the robots).Part 2, Floor 16
Here's a solution involving 17 ball-moves that my tree-search program found by itself. Bottom ball Up. 3rd ball on middle row Right. Extreme right ball Up. Extreme left ball Up, Right, Down. Extreme top ball Right and Down. Middle of the stack of 3: Left. Bottom one Up and Left. Left-hand ball of the pair: Up. Right-hand one Left, Up, Right, Down and Left. Access the steps. The card is a distraction: it's not necessary to get it.Part 2, Floor 17
Here's an 18 ball-move solution that my program found by itself. 2nd ball from the right: Down, Left. Ball that is now 2nd from right: Down and Left. Top-left ball Down. Ball in 5th column from left: Right. Push the ball to the direct left of this Right to stack with it. Top-right ball Left. Ball that is now the rightmost: Up. Ball that was to the left of it: Right and Up (redirects and blocks laser, but don't push it Left yet). Middle ball from the stack of 3: Left. Bottom of the stack Up, Left and Up. Now push the laser-blocking ball Left, and go up to push the top-left ball Right twice. Collect the card and exit.Part 2, Floor 18
My program found by itself a 39 ball-move solution for this one, and did so quite quickly when I put an extra line into the static evaluator giving more points for stacking balls in the top-right quadrant. Here's what it came up with:Top right ball Up. Second from top left: Right, Up, Left, Down, Right. Ball that's currently in the bottom gap Up, Left, Down, Right, Up, Left, Up, Right. Ball on left of this: Right, Up, Left, Down, Right. Ball that's now touching it Down, and other Right and Down to stack with it. Ball on bottom of this stack Right (into bottom right-hand corner). Extreme bottom-left ball Right, Up, Left, Up, Right, Up, Left into river. Ball that's now the middle of the bottom set of three: Left, Up, Left, Up, Left, Up, Right, Up and Left into river. Collect card and exit.
Part 2, Floor 19
Basically an 'action' level. Collect the card as soon as possible before the robots start making it too difficult. Both left-hand balls Right and toward the centre (Up or Down as appropriate, and Left). Top one Down and Left. To get one more ball into the middle river, wait until a robot enters the central area and bounce it off as appropriate.Part 2, Floor 20
Definitely an 'action' level: straightforward maze but with 10 robots.Part 2, Floor 21
Another full-screen maze full of balls. Walk Right past the first set of metal bricks without touching any balls, then work your way anti-clockwise around the second set and up to the top. Sizzle the obstacle ball at the exit. Open a path around the top right of the screen to get down to the card, then go back to the exit.Part 2, Floor 22
Try to avoid the random electric worm. Push the two bottom-left balls Up. Push the top left-ball Right. Of the row of 4 that's now near the top of the screen, move the middle two (one at a time) Right and Down. Move the extreme right ball Left and Down. Move the top-right ball Down, then, of the stack of 3 at bottom right, move the middle one Left, Up and Left, and the bottom one Up, Left, Up and Left. The ball that's now directly to the right of this can now be moved Left, and the extreme top ball Down onto it. Collect the card and exit.Part 2, Floor 23
It's all a big distraction. You don't have to collect the card or face any of the robots. Simply take the first boat and then go directly to the boat that is nearest to the steps. This has 3 leftward-pointing squares of river next to it, to make you think it will go Left, but in fact the boat itself is on a rightward-pointing square and gives you direct access to the exit.Part 2, Floor 24
When the robot is on the top row, push the middle-left ball up against it. (If the robot gets 'stuck' in the right-hand area, you might have to give up and start again.) Push the bottom-left ball Right, and with careful timing push it Up against the robot when the robot is on the top row (since this is a long push, the robot will likely move 2 spaces while the ball is in motion, and you'll need to take this into account when deciding when to push). Middle right ball Up, Right and Up; bottom left ball Right, Up, Right and Up; both of the topmost balls (the ones you pushed against the robot), one at a time, Right, Down, Right, Up, Right and Up; now-topmost balls Right and Up; remaining ball Up. Collect the card and exit.Part 2, Floor 25
Another "action" floor (invisible, can't remove visuals; 3 robots + sizzle squares to beware of; need to clear an obstacle ball at the exit before collecting the card).Part 2, Floor 26
Use the green block to block the laser above it. Use the next green block to stack a ball on top of the bottom one (which you should leave in its initial position). Use the other ball to block the right-hand laser (under the 3rd green block), and push it against its laser. Use the green block you have to block the left-hand laser (the second one down from the top of the screen) and push it as far left as it will go. Push the 4th-row ball left and use the remaining green block to block the top left laser and push it as far left as it will go. Collect the card. Go back down to the bottom right hand corner, push a ball into its laser and a path is clear to the exit. (The other lasers are distractions: it looks like you might have to block them, but after the card is collected you can in fact walk around them.)Part 2, Floor 27
My program found a solution for this after some hinting, but it takes 236 ball moves. Again I didn't run an exhaustive search for shorter solutions, so here's the long one:Get the top middle dialpad, press Right. Move its top ball Left, Down, Right, Up, Left and Up into the river. Press Left. Move the ball to your upper left Down. Get the top left dialpad, press Down and move this ball Right, Up, Left, Down. Move the ball directly below it Left. Move the right-hand ball of the top left dialpad Down and Right. Move the now-uppermost ball Down and Right. Move the ball that's now to the right of it Up. Move the extreme left ball Up. Move the ball that's directly above the bottom-right ball Down to stack with it, then Left and Down. Move the bottom-right ball Right and Up. Move the bottom-left ball Right and Up as well (makes a stack of 3). Move the middle ball of the resulting stack Left, and move the ball that's now to the left of this Down and Left. Move the top-right ball Left, Down and Left, and move the left-hand ball that this now touches Up. Move the ball that this now touches Right. Move the second from top-left ball Down and Right. Move the ball that's now directly above this Up, then move the bottom-right ball Up to meet it. Move the top ball of this stack Left, Down and Left. Move the bottom left ball (left of a pair) Down and Right. Move the extreme right ball near the centre row Up, and the bottom right ball Up to meet it. Move the top ball of this stack Left, Down and Left. Move the bottom left ball Down, Right, Up, Right, Down, Left, Down, Right. Move the bottom left ball Down and Right. Move the bottom right ball Up and Left. Move the top left ball Up and Right, and the bottom left ball Up, Right and Up into the river. Move the middle ball on the right-hand side Up, Left, Down, Left, Up, Right and Up into the river. Move the bottom-right ball Right, Up, Left, Down, Left, Up, Right and Up into the river. Get the bottom left dialpad, press Up, and move its bottom ball (guess where) Right, Up, Left, Down, Left, Up, Right and Up into the river. Move its right-hand ball Down and along the same route into the river. Do the same to get the remaining bottom-left ball into the river. Get the bottom right dialpad, press Left, and move its top ball Left, Up, Right and Up into the river. Push the ball that's now to your immediate right Up as well. Collect the card. Push the ball that you most recently pushed Left, Down, Right, Up and Left, and push the ball that's now to its immediate left Up. Push the top-right ball of the centre formation Down, Left and Down into the river. Push the bottom right-hand ball of the same formation Left, then the top one Down, Left and Down into the river. Push the top right ball Down, get the remaining dialpad, press Right, and move its left-hand ball Right to stack with it, then Down, Left, Up. Move the bottom-left ball in the top-right three Up, Right, Down, Left, Up, Left, Down, Right, Up and Left. Move the top-right ball (apart from the one against the wall) Left, Down, Right, Up and Left. Move the ball that's now to its immediate left Up, Left, Down, Right, Up and Left. Move the left-hand ball of the resulting pair Down, Left and Down into the river. Move the ball that's nearest the middle Up and Left. Move the rightmost ball that's 2nd row from top Left, and move the ball that's now directly below it Up and Left. Move the left-hand ball of the resulting pair Down, and the right-hand one Left and Down. Move the bottom ball of the resulting stack Right, Up, Left, Up, Left and Down. Move the ball that's on the left-hand wall Down, and the ball that used to be touching it Right, Up, Right and Down. Move the bottom ball of the bottom-left stack Right, Up, Left, Up and Left. Move the ball that's now directly below it Down, then move the upper ball Down to stack with it. Move the bottom ball of this stack Right, Up, Left, Up, Left. Move the bottom-right ball Left, and the ball that it now touches Down, Right and Up. Move the top left ball Down. Move the middle right ball Left and Up. Move the bottom left ball Right, Up, Left and Up to make a stack of three. Move the middle of this stack of three Left, Down, Right, Up, Left and Up. Move the ball that's now immediately above this Right, Down, Left, Down, Right, Up. Move the bottom-left ball Down, Right, Up, and the one that's now immediately above this Left. Move the one that's now directly above this Up, Left and Down, and the now-central ball Up, Left and Down to stack with it. Move the bottom ball of this stack Right, Up, Left and Down into the river. Finally move the remaining bottom-left ball (apart from the one stuck in the corner) Down, Right, Up, Left and Down into the river, and take the exit.
Part 2, Floor 28
When a ball enters a river whose direction changes mid-stream, not only is the ball's direction decided at point of entry but also any river squares traversed by the ball are changed as necessary to match (and it took me some time to see that; in fact I had my own ANSI-based display code reading the level data and making it easier to see, and I wondered why its behaviour didn't match the original).Anyway, here's the solution: River 1: send 5 balls to the Left (start with the middle ball, then take the other 4 from the left of this; save the 3rd and 4th column balls for later). River 2: send 5 to Left, starting with column 5 (suggest bounce the next 3 off the 3rd-column ball). River 3: 5 into column 5 (bounce off the 4th-column ball). River 4: 3 into column 5 (if there aren't enough balls, only the first needs to go into column 5; the other two can go into column 4 bouncing off the 3rd-column ball). River 5: 1 ball into column 3 (use the 3rd-column ball), goes Right. Now back to River 1, right-hand side: put 4 in (start with the lower-right ball that's just touching it; suggest leave the 19th-column ball alone). River 2: ball in the 4th-from-end column (use the 19th-column ball). Push 4 more balls onto the right-hand wall and Down and a path is clear to the exit.
Part 2, Floor 29
My program found a solution to this floor by itself quite quickly, probably because it's amenable to a "hill-climbing" approach if you count the remaining river squares in the static evaluator. The solution it found involves 34 ball-moves; I didn't check if that's the shortest.Start by moving the bottom-but-one ball of the stack Right, then the top-but-one ball Right. Then the bottom of the stack of two (i.e. two balls below the one you just moved) goes Right. Top left ball goes Down, Right, Up. Right-hand ball on bottom row goes Right, and ball that is then directly above it goes Down to stack with it. Top ball of the top-right stack of two goes Left, and the ball that was just below it goes Up, Left and Up. Ball that was just to the right of it (left-hand ball of a formation of 3) goes Down, and the bottom ball at the far left (initial position) goes Down (redirects), Right and Up into the river. Ball that's now at extreme left can also go Down, Right and Up, and collect the card. Top ball of the formation of 3 at bottom-right: Right and Down (into bottom river). Bottom left ball Up, Right. Extreme left ball Down (redirects to make a line of 3 with them). Middle of the three Down. Right-hand one Left, Down, Right (redirects), Right. Ball that's left in the middle Down (redirects) and Down into river. Ball at the top Left (redirects) and Down into river, and take the exit.
Part 2, Floor 30
Tedious block-and-ball work. Use the ball to dry up the square by the card (don't be tempted to use the block that's right next to it). Watch out for metal-brick corner traps.Part 2, Floor 31
My program found a 19 ball-move solution for the bottom part after I modified it to cope with Bolo 2's idea of reconfiguring the directions of river segments during ball-throws (it was only a one-line change to the "successor state" function). The top part was quicker to do manually.Start by pushing the extreme left ball Up, then next left ball Up, then the third from the right (also Up), then the one to the right of that Up, then the ball that is now third-right Up, then the one to the right of that Right and Up, then the right-hand ball of the group of 4 goes Right and Up, and the ball above that goes Up, then the right-hand ball of the group of three on the left goes Right, and the one to the left of it goes Right and Up. Extreme left ball now goes Right. Middle of group of three goes Up, and right-hand ball goes Left and Up. Ball you've just gained access to goes Up, and finally the bottom-right ball goes Up and a route is clear to the card. After collecting the card, take the boat that's to the immediate left of it, get rid of the ball, take the boat above you, get rid of the ball, take the boat above you, right, get rid of the ball, take the boat above you, and again above you and you're clear to exit.
Part 2, Floor 32
Mind the random electric worm. Bottom-left ball: Up, Right, Up. Top middle: Right, Down, Left, Up, Left. Top right: Left, Down, Left, Up. Now-rightmost: Left, Up, Left, Up. Top-left: Down. Ball that's now to the right of it: Left, Up, Right, Up. Middle ball: Right, Up, Left, Up. Collect the card. Top ball: Right, Down, Left, Down (changes bottom-river directions). Remaining ball Down, Right, Down. Exit.Part 2, Floor 33
Push ball 4 Right and Up, ball 2 Left Up Left Up, and the next 2 balls (one at a time) Left, Up, Left, Up, Left, Down. Finally push ball 1 Up, Left, Down. Move the bottom ball of the stack Left and collect the card. In the central area, move the leftmost ball Left and Up to block the second top laser. Move the top-right ball Up, and the middle-right ball Right and Up to stack with it and block the top laser. Push this ball right against its laser and a way is clear to the exit.Part 2, Floor 34
Three of the balls on the right can be put into the complex via the inner bottom-right entrance, allowing you to push a fourth ball Left and collect the card. Two more spaces on the way to the exit can now be dried easily, but one remains. Put the remaining 3 balls from the right into the complex and you'll be able to push another ball Left and Down and reach the exit. The two boats and everything on the left of the screen is distraction.Part 2, Floor 35
Another "action" level. The exit appears when the card is collected, and you'll need the ball, so at the start you have to wait for a robot to go in the bottom left corner before pushing it out.There is a bug in the program that can allow a very early completion of this floor: while steps are not displayed, the program can treat their coordinates as unchanged from the previously-completed floor. So if you complete Floor 34 then choose (N)ext floor, you can hit "invisible steps" a few spaces left of your starting position. This is less likely to work if the Main Menu has been accessed between floors.
Part 2, Floor 36
The card in this level can be located in any one of the three enclosures, chosen at random each time. If you don't like where it is, you can give up and it'll choose again.For the left-hand enclosure: Second from bottom ball Left, Up, Left, Down, Left, Up; same for next ball up from bottom; the ball after that Left, Up, Left, Down, Left; top-right ball Left, Up, Left, Down; top-left ball Right; ball that was below it Up and Right against it; bottom-left ball Up and Right; middle-right ball Left, Up, Right; right-hand ball of the row of 4 Down, Left, Up, Right, Down; middle of the 3 Down, Right, Down, Left, Up, Right, Down; now 2nd-from-left Right, Down, Left, Up, Right, Down; bottom-right ball Left, Up, Right, Down, Left, Up, Right, Down; collect card; left-hand ball Right, Down, Left, Down; remaining ball Left, Down, Left, Up, Right, Down, Left, Down.
For the middle enclosure: Second from bottom ball Left, Up, Left, Down, Right; same for next two and top ball (making a row of 4); bottommost of the 2 on the right Left, Up, Right, Down, Right, Up; leftmost of column of 4 Up; top-right ball Down, Left, Up; 2 more balls Up, Left, Up to get card; right-hand ball Up, Left, Down, Left, Down; remaining ball Left, Up, Right, Down, Left, Down.
For the right-hand enclosure: Bottom ball Left, Up, Right, Down; 3 more + top ball (one at a time) Left, Up, Left, Down, Right; collect card; bottom ball Left and Down; remaining ball Left, Down, Left, Up, Right, Down, Left and Down.
Part 2, Floor 37
You have to put 6 balls into the gap before you go in to get the card. (The first 5 are to dry up the river squares, and the sixth is to provide you with a way to block the final laser on the way to the steps. You won't need to block the other laser: once you're in there, you don't come back out.) My program found a solution by itself in 67 ball moves. (I did hint the static evaluator, causing it to score positions more highly if more balls have been sent into the complex, which saved a lot of search time.) I don't think there's much I can do to reword the raw output this time, although the move ordering could perhaps be simplified in one or two places. Here it is anyway:Row 13 col 9: Up. Row 13 col 14: Down. Row 11 col 2: Down. Row 6 col 2: Up. Row 14 col 14: Right. Row 4 col 14: Down. Row 2 col 14: Right. Row 4 col 9: Up. Row 2 col 9: Left. Row 6 col 14: Left and Down. Row 11 col 5: Left. Row 11 col 9: Left. Row 11 col 2: Up. Row 3 col 2: Right. Row 3 col 9: Up and Right. Row 14 col 20: Up, Left, Up, Right. Row 2 col 19 (the middle of the three): Down. Row 6 col 18: Up. Row 2 col 18: Right, Down. Row 6 col 19: Left and Down. Row 5 col 19: Down, Left, Down. Row 11 col 18: Right, Up, Left, Down, Left, Down. Row 3 col 18: Left, Up, Right, Down, Left, Down. Row 6 col 5: Left, Up, Right. Row 11 col 3: Left, Up, Right, Down, Left. Row 4 col 2: Down, Right, Down, Left. Row 6 col 2: Up. Row 2 col 3: Down. Row 3 col 8: Left, Down. Row 5 col 3: Right. Row 5 col 5: Up. Row 5 col 4: Right, Up, Right, Down, Left, Down. Collect card, push ball Left and exit.
Part 2, Floor 38
An 'action' level: 2 robots and an electric worm, and a lot depends on the random number generator. As you go into the central area, check which area the worm is in before you get onto each boat. (If it's in the next corridor, you might have to wait for it to 'teleport' elsewhere---and double-check it doesn't re-emerge in the same place.) After you collect the card, the rivers are reversed and you're given more boats to get out, but you might find the worm has you "cornered" in a corridor and won't leave (it can't teleport after the card is collected). Therefore, before entering the central area and collecting the card, you'd better wait until the worm is inside the central area, which initially gives you more of a headache but at least means you can leave in peace.Part 2, Floor 39
Yet another action level that involves your being invisible, unable to remove visuals, many robots, and have to sizzle an obstacle block before collecting the card.Part 2, Floor 40
Push the ball that's directly below the card Up. Move the green block Right 1, Up 2, Right 7. Move the ball below Right, Up (and optionally Left): green block is now more manoeuvrable. Using the green block, cause the middle row's right-hand ball to stack with the ball that's to the lower right of the card, and then bring in another ball from the right to make a stack of three. The bottom two balls of this stack block 2 lasers: push them against their lasers. Go up to the two lasers at the very top of the screen and push the balls against their lasers. Go to the left-hand ball on row 5 column 3 and push it Up. Don't collect the card yet. Use the green block to get the ball that's just to the card's lower right to move Down 2 spaces, then use the green block to get one of the balls to its left to move Right 3 spaces ending directly above the sizzle square. Move the green block down to the immediate right of the other green block, and push it Down 1. Collect the card. Push the two right-hand balls down and a path is clear to the exit.Once again there is no ending sequence. The standard choice of "next floor or main menu" also appears at the end of floor 40 but either key takes you to the main menu.
Additional floors
 Here are some additional puzzles I made myself, in a replacement bolo4.ovl for Part 1 (please back up the original first). Only the first 11 floors are serious, but I did fill in the others to stop Bolo from crashing if you select one by mistake: all but two of these others are solvable levels but not very interesting as such: they're mostly redirector patterns, and the "real" floors are 1 through 11 although 3 is quite poor.
Solutions: Floor 1: Push a ball toward the bottom-right into the river at the right. Bottom-left dialpad press Right; bottom ball Up; top ball Left. Top-left green block Left and stack 3 wall balls under it (put one in river for access); right-hand ball (the one between two gaps) Left and Down. Of balls at bottom left, middle one Right twice, then bottom one Up and Right. Left of right-hand pair Down, left of left-hand cluster Down, right of right-hand cluster Down and Right and bottom ball Right and Down, then top Down, Right and Down; of pile of 2 that's now to the right, top Right and bottom Down; left-hand pair both Right-Down-Right-Down; push a ball Right to access extreme bottom-right balls: push left-hand one of these Up, then push laser ball Left and middle ball Up, Right and Up, bottom two balls Up and top ball Left. Then go around moving 3 balls to access inner area, green block left 3, dialpad bottom + top Down, right-hand Left and Down, left-hand Up, other ball Left and Down, block Left and ball Down and Left, take boat. Get card; exit via other dialpad. Re-enter from top left to fetch green block (via top Left) and take it to steps. Floor 2: bottom-left green block Left; ball above player Up; row of 3 balls at top: the lower one to the right of them goes Right, the middle one goes Down and the other two go Right (move green block down for access); remaining ball Right allows access to middle section (dislodging two balls on the way); push the first two of the three bottom-left balls into the river and the one to their right Left and Up, then go back around to push the starting green block Right and the ball Down, then go left through the dialpads to exit. Floor 3 tedious (ignore the cards and the top-right stuff); Floor 4 start with block down 3, left, ball right, pair of balls up, right-hand up, get card, dialpad press Left, right-hand ball Up, bottom Up and Left, other Left and Down, then the stack of three Left, Down and Up. Floor 5 clear a path and sizzle the obstacle block before getting the real card at bottom right; Floor 6 push left ball before right ball, then push this Left against laser, go around to boat section, redirect ball Left, Left, Down, take right-hand boat, ball Down, Right, Left, middle one Left-Down-Left-Down via 2 boats, other section Right-Up etc: when got card, zap near-end obstacle block then do final section balls Left, Left-Up, Left-Up-Left. Floor 7: start with green block down 3, dialpads from right press Right, 3rd lower-ball Down, 1st Up/Right (left-hand ball Up), top 2nd Down-Right, 3rd Down-Left-Up-Right-Right, next Down-Right, green block up 2 and 2 more Left-Up-Right (or use the ball that's down; last Up-Right). Floor 8 robots don't have to be let out; in main area, bottom right wall block moves down 1 and left under leftmost redirector, dialpad Left, Up, Right (all from the dialpad square). Top one Left, then left one down, get card, right one Right, bottom Up-Left-Down-Left, othr Right. Floor 9 all but the central area is distraction; carefully work your way down; when 3 dialpads to go it should be possible to trap the robots on each side in the upper area (and optionally push balls up to stop them moving), then use remaining dialpads to get out. Floor 10: boats: down, down, ball right, down, up; left-hand ball left-down-down, card, free the robots, run and take boats back up. Floor 11: left Up, right Up 3 times (use central boats 1st time; careful at right: don't take dialpad + do blocks for next-time's boat), other left, card/block up, right repeatedly, right Up, bottom Left-Down.
Editing the levels (Parts 1 and 2)
I'm not sure you're "supposed" to do this, but I found the boards are stored inbolo4.ovl (for Part 1) and bolo24.ovl (for Part 2) as 600 lines (15 rows x 40 floors = 600), each of which has 24 bytes (22 columns plus a DOS 2-byte newline). Apart from the newlines, each line is obfuscated by setting each character's high bit and also XOR-ing with a multi-byte key, which is the ASCII floor number followed by the word PASS.
Before this obfuscation, the alphabet A to Z gives:
| A: | blank |
| B: | metal brick (in Part 1 this displays as a gap on some floors, hard-coded by floor number, but the function is the same) |
| C: | green block |
| D: | ball |
| E: | laser (all lasers point right; if pointing at a river, note the program does not treat river-drying as an event that requires beam recalculation, but beams are still effective in the space to their immediate right) |
| F: | sizzle square (fizzle?) (it seems the maximum number of these the program can manage is 88) |
| G: | robot (go-bot?) (don't put too many of these: besides annoying the user, large numbers can slow down the program, and 32 or more cause crashes) |
| H: | river right |
| I: | river left |
| J: | gap (Part 2 only) |
| K: | ball redirector (redirekt?): requires an empty square in target direction (not immediately another redirector, and not immediately a beam to the left unless it has already been interrupted further to the left by the same ball-move; beams immediately above or below sometimes work). Program might misbehave if a river is reached in the same move (this is less likely if ball travels left, but can still occur) |
| O: | walking oval (if more than one is added, only the last will move) |
| P: | special collectible (by default does nothing, but on some floors it's hard-coded to reverse rivers, turn off robots, or clear dial pads) |
| R: | river left with boat |
| S: | steps (if more than one is added, only the last will work) |
| T: | river right with boat |
| W: | metal brick (unconditional, unlike B which is sometimes displayed as a gap in Part 1 depending on the floor; W is not used in Part 2 but is still recognised by the program) |
| X: | make player invisible |
| Y: | dial pad (don't put too many: 64 or more can cause crashes) |
| Z: | card (if more than one is added, only the last will work) |
Of course, if you know the current value of a particular square you want to change, you don't even have to figure out where it is in the obfuscation key: simply XOR the two ASCII codes of the letters you want to change from and to (e.g. to change empty into ball, 0x41 ^ 0x44 = 5) and XOR this with whatever byte is already there at (floor-1)*360+(row-1)*24+(col-1).
The 'demo' floor is stored unobfuscated in bolo5.ovl with its keyboard scan codes in bolo3.ovl (in Part 2 these files are called bolo25.ovl and bolo23.ovl but they are identical to Part 1's). The player's initial position is hard-coded for each floor, as is the random electric worm on some floors and the "can't remove visuals" property, as well as the unusual elements of floors 35, 36 and 38 in Part 2.
bolo2.ovl is a single PCX image containing all the graphics used in the puzzles (as well as some that's not used e.g. a vertical laser beam); bolo1.ovl and bolo6.ovl are PCX images used in the startup screens and bolo7.ovl is the text of the registration form. (Part 2 inserts a 2 before each of these numbers: its bolo22.ovl is identical to Part 1's bolo2.ovl but the other three differ.) None of them are really DOS "overlay" files as implied by the extension ovl.
Editing the graphics is not recommended, because the program expects to be able to read certain colour values directly from the screen when it's calculating things like ball motions and laser paths, and if the colour values are not what it expects then chaos may ensue. If you want to edit the graphics anyway, you'll need a program that can write old-style PCX files. Most versions of The GIMP can import bolo2.ovl but do not re-export it in a way that bolo1.exe will read correctly. The old DOS version of NeoPaint works if you temporarily change the extension to pcx. Changing the background grid is tedious because it's present under most tiles, and global colour replacement will almost certainly 'confuse' the program.
Five of the sound effects can be altered in the .exe: after pklite -x their SMX codes can be found, each starting with MBL, although you can't change their string lengths without serious binary alterations.
Recall that in SMX ABCDE is not a scale but drops by a 7th after the B if the octave isn't changed; Bolo uses this in some of its O0 sounds.
Score (Parts 1 and 2)
In Parts 1 and 2 the score is computed as follows:1000 points,Thus if you want a high score you need to reduce distance travelled and conserve movables.
+ 13 for every ball currently on screen,
+18 for every green block currently on screen,
-1 for every 10 arrow keys pressed so far,
-2 for every random electric worm "teleport" so far,
down to a minimum of 0.
Many of the solutions here are not given with the least travelling distance, because to do so often makes them more complex to describe. For example, in Part 1 Floor 25, at one point you are asked to move one ball Right, Down, Right and Down, then another ball Left, Up, Right, Down, Right and Down. This is a relatively simple way of describing the solution by dealing with one ball at a time, but it takes well over 100 keystrokes, because you have to walk nearly the entire height of the board (and around a few obstacles) four times while following those balls around. To reduce the number of keystrokes, you can first of all push the second ball Left and Up, then push the first ball Right, the second Up and Right, the first Down, the second Right and Down, the first Right, the second Down and Right, the first Down, and the second Right and Down. That sequence has the player taking a "detour" to the top area of the board only once instead of twice, but it sounds more complex as the player has to keep switching from one ball to the other (and notice the number of ball moves goes up: reducing walking distance is not always the same as reducing ball moves). Describing this would be easier if we invented a term like "stack-move" for moving a pair of balls that are stacked against a third object, in a direction perpendicular to the stacking direction, by first pushing one of the pair, then moving the second into the first's old position and pushing that: once we understand "stack-move" as a single concept, we can say "move the ball Left and Up and stack-move the resulting pair Right, Down, Right and Down". But a set of solution notes that invents too many new terms in this way could require a glossary and/or make things more difficult for anyone who wants help on just one particular level without having read through the entire document. (I did in places use "block-and-ball moving" as a single concept, but I tried to draw the line at that.)
Similarly, there are occasions where a ball or block could be placed somewhere "for later" while you are in one area of the board, to stop you from having to walk a long way back to that area to make the move later on. I have sometimes written such things into the solutions, but not if I thought doing so would add unnecessary confusion. To continue the Part 1 Floor 25 example, the top right-hand ball could be moved down earlier than I said, so that you don't have to return to the top-right area near the end (but don't move it down too early or it will impair the manoeuvrability of the right-hand ball on row 6). However it seemed simpler to describe the entire path of that ball in one go, rather than break it into separately-placed instructions for the sake of a small increase in score points. (On the other hand there are likely some places in these notes where two or more instructions could have been merged but were not. I'm not perfect.)
If you wish to look out for opportunities to "optimise" these solutions for score, by taking advantage of the player's current area to advance-move certain balls and blocks, you can do so, but beware the danger of prematurely piling up so many balls or blocks that the player cannot walk around them when that is needed later, and remember the first rule of any code optimisation effort (apart from "don't do it" and "don't do it yet") is "measure" (in this case by checking that the additional block-move overheads in the more complex strategy don't actually negate the savings from avoiding long walks). If on the other hand you want to record a "speed run" (completing puzzles in the shortest possible clock time) then note that the shortest clock time is not necessarily the least number of moves, because long-distance ball moves can take time to animate, especially if redirectors are involved, but still only count as one move for scoring. (And if there are lasers on the screen, all beams are redrawn afterwards if any beam was crossed during the move, which can be a brief slow-down on slower machines or on emulators set to run slowly. The program appears to have been written in a 'semi-compiled' version of BASIC.)
I expect most users simply wished to solve the floors, without regard to whether their solution achieved the highest possible score and/or shortest possible time. Before publishing this walkthrough, I found no other (apart from a placeholder on a commercial advertising site that was hoping someone would come along and give them some 'content', which I didn't: besides anything else my browser didn't show their sign-up process). I did find sporadic discussion-group mentions of people having taken years to solve certain floors with no success, but nobody asking how to improve their score. By contrast, most "easier" games of the period had several walkthroughs online, often explaining how to achieve the maximum possible score, plus videos of people completing them in record time. So I assume Bolo Adventures was so difficult to solve at all that few people concerned themselves with score and time records.
Bolo Adventures 3 did away with these scoreboards and simply kept track of which puzzles have been solved and which have not. Perhaps the developer realised how few people "kept score"---possibly even fewer given that there was no easy way to compare your score with others (players had separate scoreboards, and the only way to get your initials shown to somebody else was to edit their .scr file which you probably weren't "supposed" to do). Part 3 doesn't even provide an obvious way of individualising the "solved or not" list; perhaps this change was made to encourage more families and other groups to solve the puzzles collaboratively.
Bolo Adventures 3
The closing screens say the author provided official Part 3 solutions to registered users, but his business doesn't seem to have been passed on to anyone (order links unmaintained and phone number out of service in 2020; entire website replaced with a brief "thankyou for 30 years" by early 2021) so here's my notes instead. They were taken from Bolo Adventures 3 version 1.1.Compared with Bolo Adventures 1 and 2:
- The engine and graphics have been overhauled, with consequently different file formats. Thankfully the new engine does away with the "action", the "visuals" and the grid-lines, although the invisible mode is still present in puzzles 6 and 13. The grid is slightly larger (22x16 instead of 22x15).
- The rules have been modified. For example it's now possible to push balls (but not blocks) out of lasers without stepping into the beam. (This is necessary in Puzzle 1 and might perplex someone used to the old rules.) The "demo puzzle" now pauses and explains what's happening.
Solutions for the first three puzzles are provided even in the unregistered version: it's on the Options menu.
Part 3, Puzzle 4
The key to solving the first part is to make stacks to the right and bottom right: top right goes left, down, right; top left goes down; bottom right goes right and up; bottom left goes right and up; bottom left goes right, up, left, up, right; ball now below it goes up and left; middle of 3 goes left and up; then it's not too hard to put in all the balls (top left goes in last). On the right-hand side, start by pushing right and up; you can then use the left-hand balls to help make the stack of 6.Part 3, Puzzle 5
Push box 1 space left so the right-hand ball can be pushed against the ball above the laser; push ball Up and Left. Push left-hand ball Up to block topmost laser. Push box right 1 and up 4; push nearby ball Right and Up. Walk around to top laser, push ball Left to access top area, press button. Push nearest ball Down to free up the box, and next-nearest ball Down to the bottom of the screen. Walk back to the box, move it Left until clear of the laser above, then down 2 so it blocks the first of the 3 lasers. Ball that's now to the player's above right goes left and down (pushing it out of its laser without stepping into the beam). Walk around to the stack of 2 balls at the bottom of the screen, push the top one Left and access the steps.Part 3, Puzzle 6
This is a tedious invisible ball maze. When keeping track of your invisible location, remember that, after pushing a ball, you must then repeat that direction if you want to actually go to where the ball came from, which is different from the rules of Parts 1 and 2.Part 3, Puzzle 7
This requires too much observation of 2D water directions. The three bottom balls need to stack to the right after the box has been placed to get two of them into the right-hand end of the middle river. Then the 4 balls go into the water to the right, then move the box to the immediate lower left of the column of 2 bricks and walk around to push it down into the water. After that the two balls above can be pushed Right and Down, press button and exit.Part 3, Puzzle 8
Again this requires much observation of 2D water directions to see how to solve. Use the box to put two of the bottom-left row of balls, and all 6 of the top-right balls, into the leftmost two holes at the top plus the six squares in the very top row of water to the left (you will need to go via the bottom-right area of the screen to get the right-hand balls in without filling in a third hole---don't fill in the third hole or there won't be enough balls later). Use items in top-left area to access central area, then use box to access button, which reverses the direction of flow. Push in the box at bottom left, then push each of the remaining 3 bottom-left balls left against the wall and up, drying the remaining 2 river squares and filling the hole.Part 3, Puzzle 9
In the first area, push top-left ball down onto the box, bottom-right ball Left, top-right ball Left, Down, Left, box out of the way, middle of 3 Up and Left, one that was to the right of it Left, Up, Left (this clears the water to the left, which if you looked carefully did not turn toward the top of the screen on the fifth row from the bottom) and the remaining two balls go Up (which clears two river squares at the top that you'll need to walk on in the last part). Meanwhile in the left-hand area, push the ball above a hole down into its hole, walk around to the top-left area, use the box to move the rightmost ball Left and Down, and the other ball Right to 2 spaces further to the right of the first ball, and Down, such that both balls are accessible for pushing left. Put the box just above the laser and one space to the right of it, push both balls left and down (filling two holes). Walk around and push a ball Right into a hole to access the button (press it). Then at bottom-left push bottom ball out of the way (right), two of the other three Right/Up to fill two holes, and the third similarly to block the laser. Use the block to put the remaining free ball in the river at top right, and also the laser-blocking ball (which can be pushed out of its laser without getting zapped in Bolo 3), and finally the block. Access the steps area from the left (the entrance at its base is a distraction and should not be used), and, starting on the top row, push balls right (filling a hole), down, and right to access the steps.Part 3, Puzzle 10
Dry up enough squares of circular river from the bottom so you can push a ball up to clear a path to button. Be careful which balls you start with and in which directions you push them so as not to make them unusable. One ball must be saved for blocking the top-right laser.Part 3, Puzzle 11
This is not too difficult as long as you know you have to press both buttons in either order. Whichever one you press first gets rid of the holes, and whichever one you press second gets rid of the crates. Move the bottom-left ball Right, and the top-left ball Down, Right, Down, Right and Up, so that 5 balls can be thrown into the top river (to get the fifth one in, after doing the first two you need to make a row of 3 so you can start putting them in from the Right). Before pressing the button you need to get the remaining bottom-left ball Up, then it's not too difficult to press both buttons and the rest is simple block-and-ball moving.Part 3, Puzzle 12
Ball to the immediate lower right of steps goes Up. Ball that's now to player's upper right goes Left and Up. Ball that's now to player's lower right goes Right and Up. Of the two balls at bottom right, the left-hand one goes Left, Up, Right, Up, Left, Up, and the right-hand one goes Left, Up, Right, Up, Left, Up, Right. Ball at top left of playing area goes Down, Right, Up, Left, Up, Left. Ball in middle of playing area (to bottom-left of steps) goes Right, Up, Right, Up, Left, Up, Left. Ball that's now to its left goes Down, Right, Up, Left, Up, Left. Ball that's now to its left goes Down, Right, Up, Left, Up, Left, Down. Press button and exit. (The bottom left 3 balls are unused.)Part 3, Puzzle 13
The puzzle itself is straightforward laser-blocking, but you have to play invisibly.Part 3, Puzzle 14
Do not press the button at the top: it's a trap that removes all the balls. Instead, push the rightmost ball up under it to block the topmost laser, block the other lasers in the obvious way, and throw all remaining balls into the river, starting with the ones directly above the middle gap.Part 3, Puzzle 15
This is a full-screen box maze; to solve it, you need to understand that balls can fill holes but boxes cannot.There is no ending sequence (at least not on the unregistered version). The full version, if you can still find a copy, has 30 floors and includes solutions.
Rescue Rover
I don't know how much Bolo Adventures influenced the graphically superior Rescue Rover (Softdisk 1991-93), but the latter's puzzles are trivial by comparison. In room 5 push the crate right five squares to line up with the ball; room 7 doesn't need the ball (just the flying thing); in room 8 bridge-build right then go anti-clockwise and push top-left island's block one space left before going clockwise and starting to build the second bridge at bottom left; room 9 block middle robots first and push top ball right and bottom up and right before blocking bottom robots and pushing glider; the only half-serious challenge in the unregistered version is room 10, where, after the obvious card collecting and mirror moving, and sliding mirrors to get rid of the robots, it is necessary to move the newly-accessible mirror down (but not to the very bottom) and right (and up 2, down 1 and right) then bring the other mirror around to create a rightward beam which the new mirror can then be positioned to deflect onto the lasers.Editing Rescue Rover levels (again I'm not sure you're "supposed" to do this): Very few Bolo floors are readily adaptable to the Rover engine. It works on Part 1's floors 25 and 27 and Part 2's floor 33, if you remove sizzle squares, replace card with dog, and use right-pointing robots instead of lasers (at least when they're pointed at other lasers or the dog). Part 1's floor 9 works with stationary water if you use the third solution (pushing a ball against the robot won't work because Rover's robots stop balls only from the front), and you could adapt Part 2's floor 16 by using water instead of sizzle squares (except for the bottom one which should be a wall, and perhaps a door in place of the middle-row one). The other Bolo floors rely too heavily on rules that Rover doesn't implement.
Rescue Rover 2 has a difficulty setting, which controls the speed of the moving robots but doesn't affect the puzzles. Rover 2 keeps all its maps in one LEVELnn.ROV, LSB-MSB integers with run-length encoding possible (0xFEFE, iterations, data); the 3rd such integer is the number of columns and the 4th is number of rows (the 1st and last columns and rows are not displayed and are usually set to empty tiles, with a visible border placed around the inside of these); next 5 integers should be left alone, and the following should be set to 16*ceil(1A): 0=empty 1=grille 2=glowing 3=water 4=brick 5=card 6=horizontal door 7=vertical door b=water up c=right d=down e=left 10=steps. If the map's not a multiple of 8 integers then it's padded. After the main map there's a separate map for the movables: 0=none, 1=dog, 2=robot up 3=right 4=down 5=left, 6=moving, 7=moving and shooting (nasty), 8=homing, 9=laser up a=right b=down c=left, d=mirror N/W e=N/E f=S/E 10=S/W, 11=crate 12=ball 13=glider, ff=start position.
Rescue Rover full version;
Again I didn't come across these at the time. They were distributed only commercially, but for the sake of completeness I was able to borrow someone's original copy to make these notes.
Rescue Rover 2
GAMEMAPS.RR2 file which I didn't analyse: I don't think any of the engine's enhancements help with Bolo floors, so if "modding" Rover for selected Bolo puzzles you might as well start with the more widespread original Rover.
Pitfall Pete
While I'm at it, I might as well write up my notes on these earlier "diamonds and boulders" puzzles that required Bolo-like planning although with different rules. They were written for the BBC Microcomputer by Jonathan Temple, printed in Beebug 5.7 (1986) and reprinted in 10.7 (1991), and can run on modern machines in BeebEm or similar. I seem to remember making changes as I typed in 10.7's listing; I can't check because I lost the box of BBC Micro disks (which might be just as well, since some of the programs I wrote in 1989 were a bit silly, although I wouldn't mind reminding myself how I fit a background on-screen alarm clock into 256 bytes of 6502 code in 1992, but I digress), but I've re-tested these notes on the unchanged version, which runs in graphics mode 5 (160x256 rectangular pixels in 4 colours from a palette of 8) and is played on a 20x14 grid using the Z/X/*/? keys. If you want to "cheat" you can obtain screen codes by quitting the program and inspecting P%(2), P%(3) etc (see lines 2820-2830; RND is different on the Master versus the Model B); similarly if you prefer control via the arrow keys change the INKEY codes in lines 540-570
from -98, -67, -73 and -105
to -26, -122, -58 and -42
(the machine code at R% reads the character at cursor into C%).
There were 10 more screens on 10.7's Magazine Disc (filename PitScrn)---I didn't subscribe to these diskettes as it was considerably more expensive than the print-only subscription, but issues could be bought individually and we did get this one after family members liked the typed-in levels on my grandmother's second-hand BBC.
I myself designed extra levels for another of Beebug's games, and Beebug actually offered to buy these for their Magazine Disc (I hadn't realised contributors were paid) but at that age I didn't know you're supposed to reply to such offers: I thought the next step would be automatic, but it wasn't, and I have no surviving copies. It wasn't very much of a puzzle game though.
All material © Silas S. Brown unless otherwise stated.